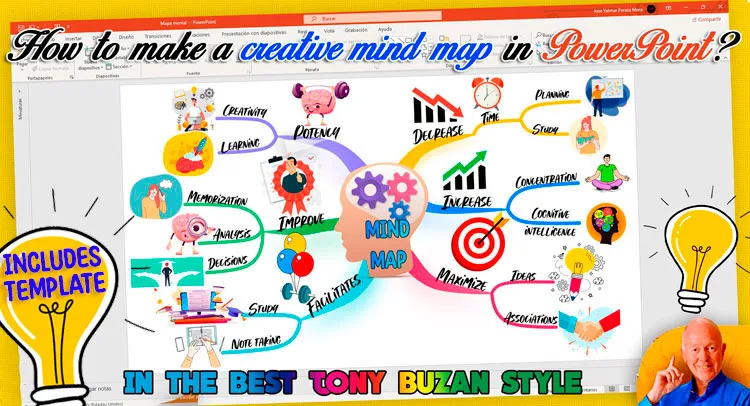
When you finish reading this post, you will learn how to use PowerPoint to create a beautiful, creative and organic mind map with its lines in the shape of tree branches, the same way Tony Buzan the inventor of mind maps makes them.💡
You will get professional results, very similar to those of spatial programs for mind mapping such as: ImindMap, Freeplane, miMind, among others.
Follow carefully the simple steps that I will give you below, and if you are a student, I assure you that your teacher will not believe that you have made the mind map in PowerPoint.
How to make a mind map in PowerPoint?
To make a mind map in PowerPoint it is important, first, to know what is the right way to do it, how is its structure, what elements it has, among other things.
To do this, enter the following post to learn the indications of the inventor of mind maps Tony Buzan, and you will surely create a real mind map.👈
☝ Before we start, we need to set up the workspace.
Right-click on the slide and select Layout > Blank. That way you will have a clean space.
Now, let's get to work!
First step: Central image
In the center of the sheet, place an image that represents very well the subject to map, next to it or over it, write the title or main word. (Use a font with a not so formal style and edit it, add color, outline, etc., whatever you prefer).
Example: In my case, I am going to map the benefits of mind mapping; I got the following image that I found ideal for my topic.
Second step: Creating organic lines
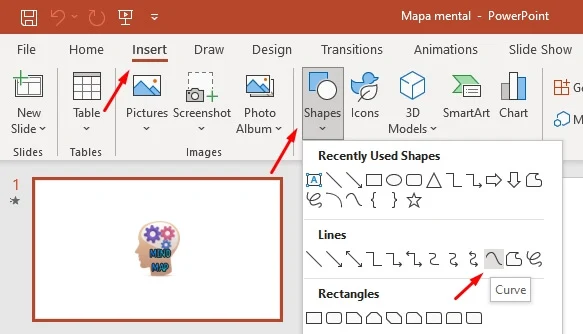
In the main menu click on Insert > Shapes, in the Lines area select the Curve tool.
Start from the center image by first clicking on the area where you want the "branch" to start, then continue clicking further where the curvature will be applied, and so on until you reach the same starting point.
Once finished, right-click on the branch and select send to background > behind text. So that it is below the central image.
Create the number of lines for each main word, in my case there are 6. You can do each one separately, or copy and paste the one you have already created and distribute them like clock hands.
It is important to give a different color to each branch. Optionally, you can apply a gradient, shadow, etc.
Third step: Labeling the lines or "branches"
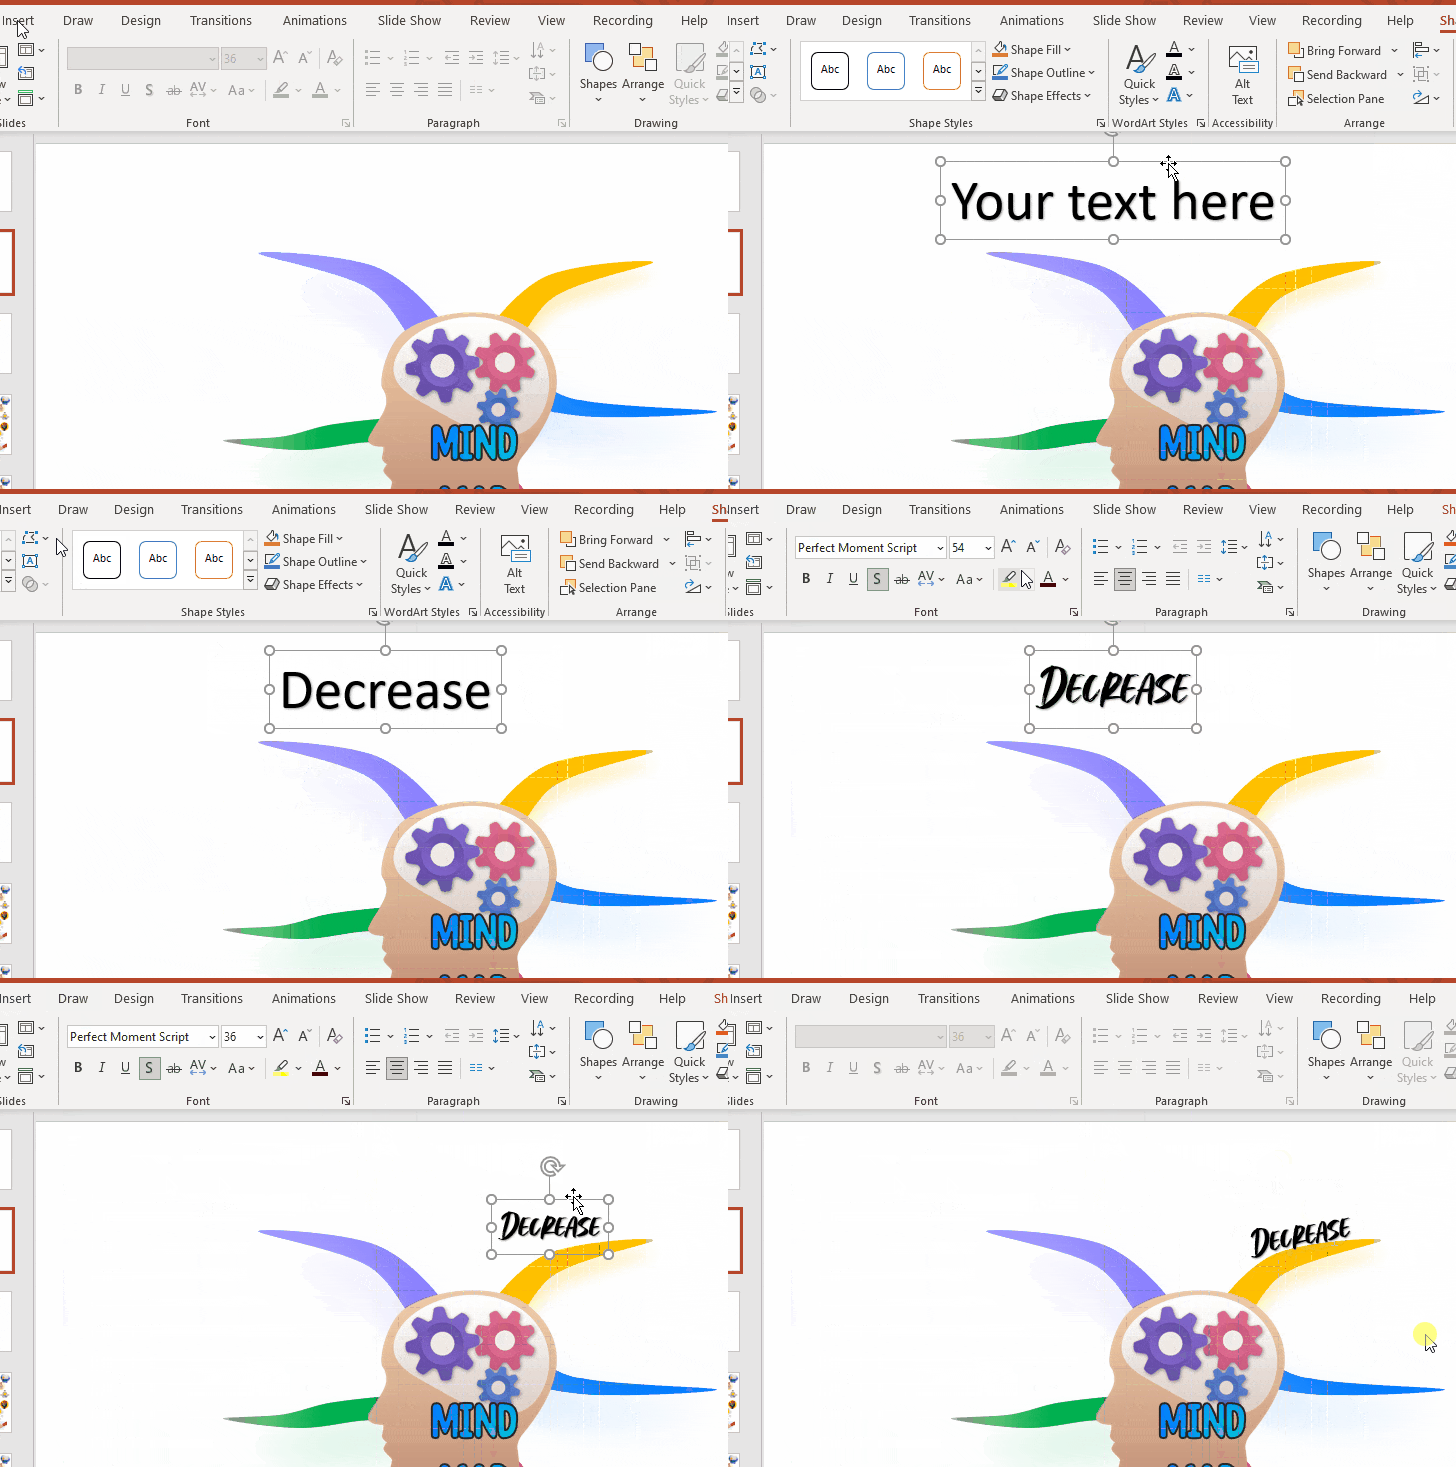
Go to Insert > WordArt and select one of the many available designs. Remember to use a suitable font.
With all the main lines labeled, you will get a result similar to the following image.
4th step: Creating Second Level Lines or Branches
In this penultimate step, we are going to add the secondary branches; which are smaller and sprout from the tip of the main branches. Observe. 👀
To do this, we will simply make some lines with the same curve tool, we will also give it the same color as the branch.
In the same way, copy and paste the branch as many times as you need and place them as shown in the image.
It is important that the secondary lines have the same color as the main ones, you also have the option to change their thickness.
5th step: Labeling the secondary branches and adding the images
You are about to finish your mind map with an amazing result, in the next steps you just need to label the branches and that's basically the same thing you did at the beginning.
Look how beautiful it looks. Now you just need to search the internet for images, illustrations or icons to give it that unique touch of mind maps.
As a final result, after searching for the images, look how my mind map looks. Beautiful, isn't it! I know yours looked spectacular too.
You have a button to download the mind map and re-edit it for use in your projects. 👍
There are so many amazing things we can do in PowerPoint with a little creativity and imagination. I hope I have helped you and taught you how to make a nice mind map. Help us by sharing with your friends.
